
Onigiri - Japanese Rice Ball.
Hello everybody, it is Jim, welcome to our recipe site. Today, I will show you a way to prepare a distinctive dish, onigiri - japanese rice ball. One of my favorites food recipes. For mine, I am going to make it a bit unique. This is gonna smell and look delicious.
Onigiri - Japanese Rice Ball is one of the most favored of current trending foods on earth. It's easy, it's quick, it tastes delicious. It's appreciated by millions daily. Onigiri - Japanese Rice Ball is something which I've loved my entire life. They're fine and they look fantastic.
To begin with this particular recipe, we must prepare a few ingredients. You can cook onigiri - japanese rice ball using 17 ingredients and 7 steps. Here is how you cook it.
The ingredients needed to make Onigiri - Japanese Rice Ball:
- {Make ready of short grain white rice.
- {Prepare of water.
- {Get of grilled salted salmon fillet.
- {Prepare of frozen peas.
- {Get of fine salt.
- {Get of Any types of Japanese Tukemono pickles.
- {Make ready of black toasted sesame seeds.
- {Get of white toasted sesame seeds.
- {Get of dried nori seaweed.
- {Make ready of For Katsuobushi Filling.
- {Take of bonito flakes.
- {Make ready of soy sauce.
- {Prepare of mirin.
- {Make ready of For Tuna Mayo Filling.
- {Get of tinned tuna, drained.
- {Prepare of Japanese mayonnaise.
- {Take of soy sauce.
Steps to make Onigiri - Japanese Rice Ball:
- Cooking rice first. Wash rice thoroughly and repeat until water becomes almost clear. Repeat rinsing and draining for at least 3-4 times until the water becomes fairly clear. Place the drained rice together with the appropriate amount of cold water in a heavy based medium saucepan and soak for at least 30minutes..
- Start cooking the rice with the high heat, covering with a lid and bring to boil. Once it reaches to boil, then reduce the heat to the lowest heat and simmer for about 12-15 minutes or until water is absorbed. You must keep the lid closed at all times as you are steaming the rice, not boiling. Once rice is cooked, leave it to set with the lid on for another 15 minutes..
- While cooking the rice, prepare for the fillings. Mix each fillings in a separate bowls and set aside. Quickly boil frozen peas with a little salted water for about 3-4 minutes, drain and leave them to cool. And then chop cooked peas finely chop or blitz for few seconds to make fine pieces. Flake up grilled salmon..
- Transfer piping hot rice into two separate medium bowls to the ratio of one 2/3 to one bowl and 1/3 to another bowl. And then prepare water in another bowl. Leave 1 tbsp of salt on a saucer. Mix chopped peas into 1/3 of rice and mix..
- Wet both hands and then touch salt with three wet finger tips and then spread salt to over both palms by gently rubbing both hands. Take a handful of the rice and then make a bowl by shaping it into triangular shape..
- Once you formed a triangular shape, poke the middle with an index finger and then add one filling. Cover the hole with a little extra rice and the shape it back to triangular again. Repeat this with the rest of rice and different filling. Best to use tuna mayonnaise filling for pea rice and use salmon filling and katsuobushi filling for plain rice..
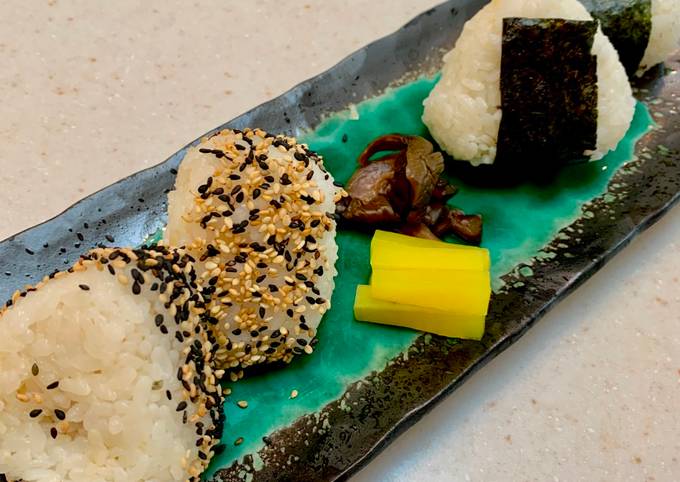
- On a plate, sprinkle mixture of black and white toasted sesame seeds. Take katsuobushi filling rice ball and then run through the 3 surfaces that are not triangle shape. Use nori sheet to cover two triangular side of salmon rice ball. Serve with Japanese pickled vegetables on the side..
So that is going to wrap it up for this exceptional food onigiri - japanese rice ball recipe. Thanks so much for your time. I'm confident that you can make this at home. There is gonna be more interesting food in home recipes coming up. Don't forget to bookmark this page in your browser, and share it to your loved ones, friends and colleague. Thanks again for reading. Go on get cooking!


0 comments:
Post a Comment