Recipe of Homemade Seared Ribeye, Cheesy Baked Asparagus, with Zoodle Medley

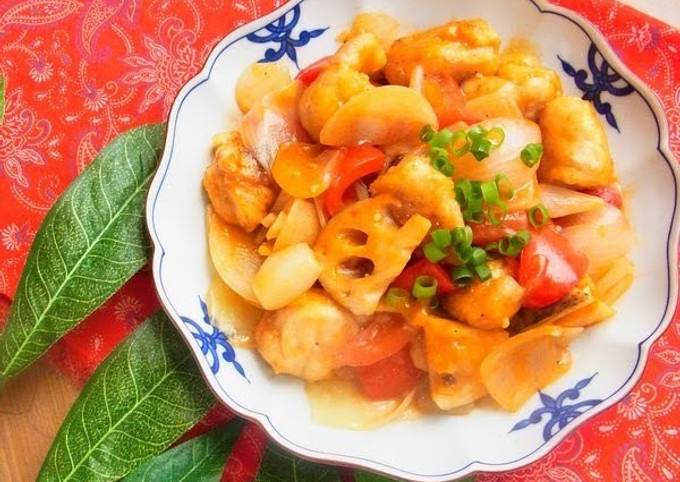
Seared Ribeye, Cheesy Baked Asparagus, with Zoodle Medley.

Seared Ribeye, Cheesy Baked Asparagus, with Zoodle Medley

Hello everybody, I hope you're having an incredible day today. Today, we're going to prepare a special dish, seared ribeye, cheesy baked asparagus, with zoodle medley. One of my favorites. This time, I'm gonna make it a bit unique. This will be really delicious.

Seared Ribeye, Cheesy Baked Asparagus, with Zoodle Medley is one of the most well liked of recent trending meals on earth. It's enjoyed by millions daily. It is simple, it is fast, it tastes delicious. They are nice and they look wonderful. Seared Ribeye, Cheesy Baked Asparagus, with Zoodle Medley is something that I've loved my entire life.

To begin with this particular recipe, we must prepare a few components. You can have seared ribeye, cheesy baked asparagus, with zoodle medley using 23 ingredients and 9 steps. Here is how you cook that.

The ingredients needed to make Seared Ribeye, Cheesy Baked Asparagus, with Zoodle Medley:

  1. {Make ready of Ribeye.
  2. {Get of 4 Ribeye Steaks.
  3. {Take of Ground Orange Peel.
  4. {Prepare of Fennel Seed.
  5. {Take of Green Onion, chived.
  6. {Prepare of Olive Oil.
  7. {Take of Horse Radish Sauce.
  8. {Prepare of Salt & Pepper.
  9. {Get of Cheesy Baked Asparagus.
  10. {Make ready of Fresh Asparagus.
  11. {Prepare of Heavy Cream.
  12. {Get of Garlic, minced.
  13. {Take of Parmesan Cheese.
  14. {Get of Mozzarella Cheese.
  15. {Take of Fry Season.
  16. {Take of Salt & Pepper.
  17. {Prepare of Zoodle Medley.
  18. {Get of Zucchinis, spiralized.
  19. {Make ready of Matchstick Carrots.
  20. {Get of Red Onion, diced.
  21. {Take of Cilantro Chopped.
  22. {Prepare of Butter, unsalted.
  23. {Prepare of Salt and Pepper.

Steps to make Seared Ribeye, Cheesy Baked Asparagus, with Zoodle Medley:

  1. Preheat oven to 400º. Place asparagus in a 9"-x-13" baking dish and pour over heavy cream and scatter with garlic. Generously season with salt and pepper, then sprinkle with Parmesan, mozzarella and red pepper flakes (if using)..
  2. Bake until cheese is golden and melty and asparagus is tender, about 25 to 30 minutes, remove from oven and let rest..
  3. Lower oven to 250°.
  4. Pat outer steak with napkin to remove excess out juices. Season with salt, pepper, fennel seed, and ground orange peel. Rub in. Flip over and repeat..
  5. On a cast iron skillet over medium high heat, coat with olive oil. Place 2 steaks in and don’t move. Let sear 6-8min, flip and repeat. Remove and place in oven for 10min. (Repeat with second set of steaks).
  6. In a separate skillet, under medium high heat, with butter as heat builds up. Toss in onion, cilantro, and carrots and sauté..
  7. In a 3qt sauce pan, fill with 1cp water and heat in medium heat with zucchini noodles. Add salt. Drain when aldente..
  8. Slice up steaks, and place slices. Top with horseradish sauce and chives. Place a portion of Zoodle and top with sautéed veggies. Add cheesy asparagus..
  9. Serve and enjoy!.

So that's going to wrap it up with this special food seared ribeye, cheesy baked asparagus, with zoodle medley recipe. Thank you very much for reading. I am confident you will make this at home. There is gonna be interesting food in home recipes coming up. Don't forget to bookmark this page on your browser, and share it to your loved ones, friends and colleague. Thanks again for reading. Go on get cooking!

Easiest Way to Make Quick Southern Candied Ribs

Southern Candied Ribs.

Southern Candied Ribs

Hello everybody, hope you are having an incredible day today. Today, I'm gonna show you how to make a special dish, southern candied ribs. One of my favorites. For mine, I will make it a bit unique. This is gonna smell and look delicious.

Southern Candied Ribs is one of the most favored of recent trending meals in the world. It is simple, it is fast, it tastes yummy. It is enjoyed by millions daily. Southern Candied Ribs is something that I have loved my entire life. They're nice and they look wonderful.

To begin with this particular recipe, we must prepare a few ingredients. You can have southern candied ribs using 19 ingredients and 4 steps. Here is how you cook it.

The ingredients needed to make Southern Candied Ribs:

  1. {Get of Ribs.
  2. {Make ready of dry rub.
  3. {Get of Brown sugar.
  4. {Take of Paprika.
  5. {Take of Course black pepper.
  6. {Make ready of Season salt.
  7. {Take of Sea salt.
  8. {Take of Ancho powder.
  9. {Make ready of Mustard powder.
  10. {Take of Basil.
  11. {Make ready of Cayenne.
  12. {Prepare of sweet glaze.
  13. {Make ready of Butter.
  14. {Get of Brown sugar.
  15. {Take of Honey.
  16. {Prepare of Tiger sauce.
  17. {Get of Agave nectar.
  18. {Make ready of Cane syrup.
  19. {Prepare of Spice rub.

Steps to make Southern Candied Ribs:

  1. Start by slathering the ribs in mustard to help bind the rub, about 2 tbs per rack of ribs. Then sprinkle on the rub & let it set in the fridge for 30-60 minutes..
  2. Melt the butter down then mix all of the glaze ingredients together in a sauce pan and bring to a boil over medium/low heat and then let simmer for 2-3 minutes..
  3. Place your ribs on the smoker or grill however you like to do it. Once the ribs are 15- 30 minutes away from being done begin applying the glaze once every 5- 10 minutes so it really sticks to the meat..
  4. If you happen to wrap your ribs in foil add some of the glaze to your foil wrap as well..

So that's going to wrap this up for this exceptional food southern candied ribs recipe. Thank you very much for your time. I am confident that you can make this at home. There's gonna be more interesting food at home recipes coming up. Don't forget to bookmark this page on your browser, and share it to your family, colleague and friends. Thanks again for reading. Go on get cooking!

How to Make Perfect Dates filled with goat cheese and covered in bacon (easy)

Dates filled with goat cheese and covered in bacon (easy).

Dates filled with goat cheese and covered in bacon (easy)

Hey everyone, it is Jim, welcome to our recipe site. Today, I'm gonna show you how to make a distinctive dish, dates filled with goat cheese and covered in bacon (easy). It is one of my favorites food recipes. This time, I will make it a bit unique. This will be really delicious.

Dates filled with goat cheese and covered in bacon (easy) is one of the most favored of current trending foods on earth. It's enjoyed by millions daily. It's easy, it's fast, it tastes delicious. They are fine and they look wonderful. Dates filled with goat cheese and covered in bacon (easy) is something that I have loved my entire life.

To begin with this particular recipe, we have to prepare a few components. You can cook dates filled with goat cheese and covered in bacon (easy) using 3 ingredients and 4 steps. Here is how you can achieve it.

The ingredients needed to make Dates filled with goat cheese and covered in bacon (easy):

  1. {Get To taste of Dates without the pit.
  2. {Get As needed of Bacon.
  3. {Make ready To taste of Cream cheese.

Steps to make Dates filled with goat cheese and covered in bacon (easy):

  1. Preheat oven to 400f you can also use the airfryer it’s faster.
  2. Open a little slit on the dates and fill them with goat cheese (you can try any cheese you’the like but goat is the perfect match).
  3. Take the one bacon pice and wrap the date with de bacon and but a skewer to secure it and that’s it!.
  4. When you got the quantity you need just put them in the oven for 15 min or until you see the bacon is crispy! Enjoy.

So that's going to wrap it up with this exceptional food dates filled with goat cheese and covered in bacon (easy) recipe. Thanks so much for reading. I'm sure you will make this at home. There's gonna be interesting food in home recipes coming up. Don't forget to bookmark this page on your browser, and share it to your loved ones, colleague and friends. Thank you for reading. Go on get cooking!

Recipe of Award-winning Fluffernutter Cookies (Gluten-Free)

Fluffernutter Cookies (Gluten-Free).

Fluffernutter Cookies (Gluten-Free)

Hello everybody, hope you're having an amazing day today. Today, I'm gonna show you how to make a special dish, fluffernutter cookies (gluten-free). It is one of my favorites. This time, I will make it a bit unique. This will be really delicious.

Fluffernutter Cookies (Gluten-Free) is one of the most favored of current trending meals on earth. It is appreciated by millions daily. It is simple, it is quick, it tastes delicious. They're nice and they look wonderful. Fluffernutter Cookies (Gluten-Free) is something that I've loved my whole life.

To begin with this recipe, we must first prepare a few ingredients. You can cook fluffernutter cookies (gluten-free) using 5 ingredients and 5 steps. Here is how you can achieve that.

The ingredients needed to make Fluffernutter Cookies (Gluten-Free):

  1. {Take 1 cup of peanut butter.
  2. {Make ready 3/4 cup of sugar granulated.
  3. {Take 1 of egg.
  4. {Get 1/4 tsp of salt.
  5. {Get 1/2 cup of marshmallows mini.

Steps to make Fluffernutter Cookies (Gluten-Free):

  1. Preheat the oven to 350 F.
  2. Mix Peanut butter, sugar, egg and salt in a medium bowl until well incorporated..
  3. Spoon 1 tablespoon of cookie dough about 2 inches apart on a parchment covered baking sheet. Flatten each cookie with the heel of your hand..
  4. Bake for 5 minutes and remove and top with mini marshmallows. Return to the oven for 3-5 minutes and remove..
  5. Cool on a rack and enjoy with a nice large glass of milk!.

So that's going to wrap this up for this special food fluffernutter cookies (gluten-free) recipe. Thank you very much for your time. I am sure that you can make this at home. There is gonna be interesting food in home recipes coming up. Don't forget to save this page on your browser, and share it to your family, friends and colleague. Thanks again for reading. Go on get cooking!

Step-by-Step Guide to Make Homemade Ube/taro cup cake

Ube/taro cup cake.

Ube/taro cup cake

Hello everybody, hope you are having an incredible day today. Today, I will show you a way to prepare a special dish, ube/taro cup cake. It is one of my favorites. For mine, I'm gonna make it a bit tasty. This will be really delicious.

Ube/taro cup cake is one of the most well liked of recent trending meals in the world. It's appreciated by millions daily. It is easy, it is fast, it tastes delicious. They're nice and they look wonderful. Ube/taro cup cake is something which I've loved my entire life.

To begin with this particular recipe, we have to first prepare a few ingredients. You can cook ube/taro cup cake using 9 ingredients and 8 steps. Here is how you cook it.

The ingredients needed to make Ube/taro cup cake:

  1. {Take of cake flour.
  2. {Make ready of room temp unsalted butter.
  3. {Make ready of granulated sugar.
  4. {Take of baking soda.
  5. {Get of baking powder.
  6. {Make ready of fresh milk.
  7. {Make ready of white vinegar.
  8. {Make ready of ube/taro flavoring.
  9. {Get of cooked purple yam. or ube jam.

Instructions to make Ube/taro cup cake:

  1. Mix the flour, baking powder, baking soda. Set aside..
  2. Make the butter cream by mixing the 1cup of milk and a 1tbsp of vinegar (mix)and leave for 10mins. Set aside..
  3. Mix the butter using hand or stand mixer for 5 min until fluppy, the add sugar gradually then mix again, then add the ube jam mix again then gradually add our butter cream mixture alternately with flour mixture until we finish the butter cream and flous mixture, beat until well combined..
  4. The pre heat the oven 160 deg celcius.
  5. Prepare you desired moulder then pour the mixture..
  6. Bake for 30 mins until done..
  7. I just add grated cheeze on top coz my son love it. Its optional..
  8. You can also used whipping cream or butter cream for toppings.. Enjoy!.

So that is going to wrap it up with this exceptional food ube/taro cup cake recipe. Thank you very much for your time. I'm confident that you can make this at home. There's gonna be interesting food at home recipes coming up. Don't forget to bookmark this page in your browser, and share it to your family, colleague and friends. Thank you for reading. Go on get cooking!

Steps to Prepare Award-winning Tricolor Potato Balls For Cherry Blossom Viewing

Tricolor Potato Balls For Cherry Blossom Viewing.

Tricolor Potato Balls For Cherry Blossom Viewing

Hey everyone, hope you are having an incredible day today. Today, I'm gonna show you how to prepare a distinctive dish, tricolor potato balls for cherry blossom viewing. One of my favorites food recipes. This time, I am going to make it a bit unique. This will be really delicious.

Tricolor Potato Balls For Cherry Blossom Viewing is one of the most well liked of current trending meals on earth. It is easy, it's quick, it tastes delicious. It is enjoyed by millions daily. They are fine and they look wonderful. Tricolor Potato Balls For Cherry Blossom Viewing is something which I've loved my entire life.

To get started with this particular recipe, we must prepare a few ingredients. You can cook tricolor potato balls for cherry blossom viewing using 8 ingredients and 9 steps. Here is how you cook it.

The ingredients needed to make Tricolor Potato Balls For Cherry Blossom Viewing:

  1. {Make ready of Potatoes.
  2. {Make ready of Dried Sakura shrimp - tiny dried shrimp.
  3. {Get of Aonori.
  4. {Prepare of White sesame seeds.
  5. {Get of Cream cheese.
  6. {Prepare of Katakuriko.
  7. {Get of Salt and pepper.
  8. {Take of Vegetable oil.

Instructions to make Tricolor Potato Balls For Cherry Blossom Viewing:

  1. Grind the dried shrimp with a mortar and pestle to a fine powder. Bring the cream cheese to room temperature..
  2. Peel the potatoes and cut into quarters. Cover them with plastic wrap and cook them in the microwave. Mash while still hot. Combine the cheese and katakuriko and knead well into the mashed potatoes..
  3. Season generously with salt and pepper. Divide the mixture into 3 portions. Mix in aonori seaweed powder to one, and the dried shrimp to another..
  4. Add the white sesame seeds to the plain white mixture and make it into 6 balls..
  5. Form the other two colored mixtures into balls as well..
  6. Put a generous amount of oil in a frying pan and cook the balls over low heat, rolling them around..
  7. When all of the balls are cooked, microwave them for 1 minute. This will help make them chewy..
  8. Thread 3 balls on each skewer, and they're ready to serve..
  9. "Sakura Mochi Style" https://cookpad.com/us/recipes/150597-shrimp-in-the-style-of-sakura-mochi.

So that is going to wrap this up with this exceptional food tricolor potato balls for cherry blossom viewing recipe. Thanks so much for your time. I am sure you will make this at home. There's gonna be more interesting food in home recipes coming up. Remember to save this page on your browser, and share it to your family, friends and colleague. Thank you for reading. Go on get cooking!

Recipe of Super Quick Homemade Tender & Juicy, Sweet and Sour Chicken Breast

Tender & Juicy, Sweet and Sour Chicken Breast.

Tender & Juicy, Sweet and Sour Chicken Breast

Hello everybody, it is Drew, welcome to our recipe site. Today, we're going to make a distinctive dish, tender & juicy, sweet and sour chicken breast. It is one of my favorites food recipes. This time, I'm gonna make it a bit unique. This will be really delicious.

Tender & Juicy, Sweet and Sour Chicken Breast is one of the most popular of recent trending foods in the world. It is enjoyed by millions every day. It's simple, it's quick, it tastes delicious. They are nice and they look wonderful. Tender & Juicy, Sweet and Sour Chicken Breast is something which I've loved my entire life.

To begin with this recipe, we must prepare a few components. You can cook tender & juicy, sweet and sour chicken breast using 18 ingredients and 8 steps. Here is how you can achieve it.

The ingredients needed to make Tender & Juicy, Sweet and Sour Chicken Breast:

  1. {Make ready of Chicken breast.
  2. {Take of Lotus root.
  3. {Take of Onions.
  4. {Take of Red bell pepper.
  5. {Prepare of Garlic.
  6. {Take of Ginger.
  7. {Make ready of Vegetable oil.
  8. {Make ready of Katakuriko.
  9. {Take of Water ( ※ for steam-frying).
  10. {Make ready of ☆ Sugar (beet sugar or cane sugar).
  11. {Take of ☆ Sake.
  12. {Prepare of ★ Ketchup.
  13. {Get of ★ Vinegar.
  14. {Take of ★ Oyster sauce.
  15. {Take of heaping tablespoon ★ Chicken soup stock granules (additive-free).
  16. {Prepare of ★ Garlic powder.
  17. {Prepare of ★ Pepper.
  18. {Get of ★ Water.

Steps to make Tender & Juicy, Sweet and Sour Chicken Breast:

  1. Slice the chicken breast diagonally into bite-sized pieces, rub the ☆ ingredients into the chicken, and set aside for 10 minutes. Combine the ★ ingredients and stir until the chicken soup stock granules dissolve..
  2. Cut the lotus root into bite-sized pieces, soak in water with a small amount of vinegar (not listed in the ingredients list) added, and drain. Also cut the onions and red bell pepper into bite-sized pieces and finely chop the garlic and ginger..
  3. Roll up each piece of chicken, squeeze them in your hands to retain their shapes, and coat them with katakuriko. Add plenty of vegetable oil in a pan and cook them until golden brown..
  4. Add the lotus root from Step 3 and water for steam-frying into the pan, cover, and shake the pan from time to time as you steam-fry until the lotus root is cooked through..
  5. Add the garlic and ginger, once it's fragrant, add the onions and red bell pepper, and stir-fry until everything is evenly coated with vegetable oil..
  6. Pour in the combined ★ ingredients into the pan and simmer for a while. Once the moisture evaporates and the sauce thickens, it's done..
  7. I recommend "Youlinji - Chinese Deep Fried Chicken with Sweet and Sour Sauce"too. Use the same pre-seasoning ingredients and drizzle on a fragrant and delicious sauce on top. https://cookpad.com/us/recipes/155753-chinese-deep-fried-chicken-youlinji-with-breast-meat.
  8. I also recommend "Yuzu Pepper Chicken Breast Karaage". The fried chicken is moist, crispy, and juicy. https://cookpad.com/us/recipes/151937-fried-chicken-breast-with-yuzu-pepper.

So that is going to wrap it up for this special food tender & juicy, sweet and sour chicken breast recipe. Thanks so much for your time. I'm sure that you will make this at home. There is gonna be more interesting food in home recipes coming up. Remember to save this page in your browser, and share it to your loved ones, colleague and friends. Thank you for reading. Go on get cooking!